The Wellington Arms

I’ve grown up with this restaurant and watched it grow into an award winning gastro pub, thanks to the wonderfully talented owners Simon (front of house) and Jason (head chef).

The Wellington Arms is a lot more special than your typical gastro pub. Lots of great little things go into making it a superb pub that I love to go to. I have visited many times before and I can see myself continuing to visit for a long while yet.

The pub is tucked away in the village of Baughurst, but this doesn’t stop people coming from far and wide for a meal there, which I suggest you must do if you haven’t been before! One thing that makes this pub so special is that there are only a handful of tables. Originally, there were only 8 tables, so you can imagine how you had to book in advance! Since then the pub has been slightly extended to allow for a few more tables and a little more space, but this has done nothing to diminish the homely country pub feeling you get when stepping inside.

The select and delicious evening menu which is chalked up on a blackboard changes daily in line with the produce Simon and Jason grow themselves. As I have my own vegetable and fruit produce and chickens at home, it makes it extra appealing to me that The Wellington Arms grows all its own fresh fruit and vegetables, as well as sourcing all meat, fish and other things as locally as possible.

Needless to say, the food is fabulous! Some of my favourites include:

  • Twice baked Marksbury Cheddar soufflé on braised leeks with a little cream & parmesan
  • Baked potato gnocchi panfried in butter with garlic, broad beans, peas, broccoli, thyme & parmesan

As mentioned before, their menu can change daily, so I have also enjoyed the gnocchi with butternut squash, walnuts, and many other glorious additions!

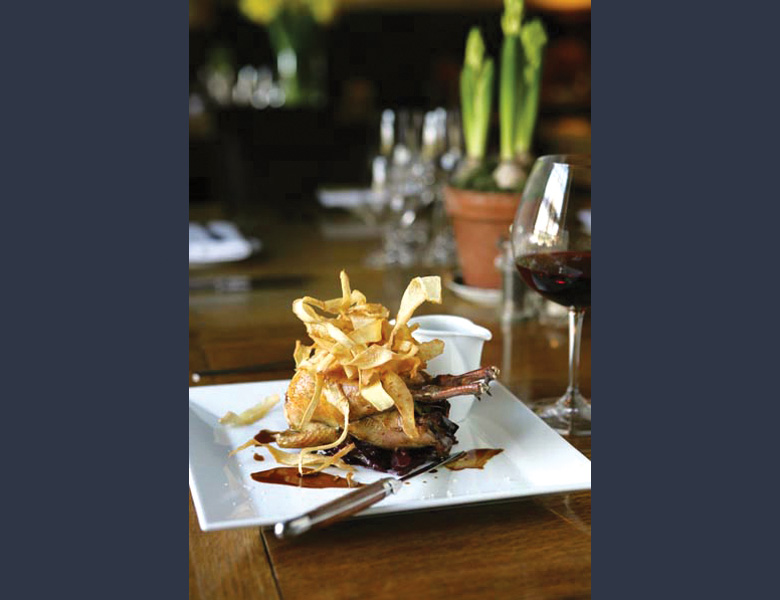
There isn’t one dish that I’ve tried that I can possibly fault, but in particular I love their lamb and cod dishes, as well as their (when I’m feeling very hungry) whole roast partridge with parsnip crisps, the picture for which (below) I have taken from the website:

welly2

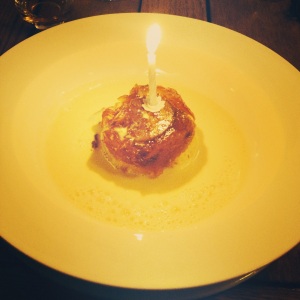
Puddings, as you can imagine, are also all freshly home made, including sticky toffee pudding, chocolate pudding, marmalade sponge and a selection of delicious sorbets and ice creams, served with a little home made shortbread – naughty but oh so nice! I recently went here for dinner for my birthday, and was thoughtfully presented with a candle in my sponge, so I made my parents sing happy birthday!:

Happy Birthday to me!

Happy Birthday to me!

As well as eating a beautiful dinner here, Simon’s mum makes knitted tea cosies for tea pots and eggs, and you can buy jam, eggs and other wonderful produce or home made items. However I think I need to invest in a smaller teacup to go with my teapot:

welly4

Lastly, if travelling from afar or just fancy a night away at a lovely hideaway like this, complete with glorious food, then there are three unique and stunning rooms available to stay in, you can have a look at these rooms here: http://www.thewellingtonarms.com/accommodation/

I hope you find the time to visit The Wellington Arms, as it really is a country pub gem you can’t miss out on! I’ll end with a couple more pictures from their website which demonstrate the points I have made throughout this review, hope to maybe see you there one day soon! 🙂

welly5

//

Homemade Sweet Potato and Butternut Squash Gnocchi

I say this about a lot of things, but I do really love gnocchi and have always wanted to try making it. So when I saw a mouth-watering recipe for sweet potato gnocchi on Pinterest I had to try it, so thanks go to this lovely lady: http://www.aidamollenkamp.com

As my garden is becoming overgrown with butternut squash, I decided to experiment further and add this into the recipe also, very daring on my first gnocchi attempt I know, but I was feeling brave! Plus Will was over for dinner that evening and I thought he’d make a good test dummy 🙂 I also added some pancetta and walnuts to the already delicious sauce, for some extra crunch. This idea I owe to one of my favourite local restaurants that has the best gnocchi I’ve ever tasted, called The Wellington Arms

Ingredients:

For the gnocchi:

  • 260g sweet potatoes, halved lengthwise
  • 130g butternut squash, halved lengthwise
  • 1 tablespoon olive oil
  • Kosher Salt and Freshly Ground Black Pepper
  • 30g finely grated parmesan cheese
  • 1 egg, lightly beaten
  • 3 tablespoons honey
  • 2 teaspoons kosher salt
  • 200-300g all-purpose/plain flour

For the sauce:

  • 1 handful of walnuts, halved
  • 6 slices of pancetta
  • 4 tablespoons unsalted butter
  • 12 to 15 fresh sage leaves
  • 2 shallots, quartered and thinly sliced
  • 3 tablespoons balsamic vinegar
  • Freshly shaved parmesan, for garnish
  • Freshly ground black pepper, for garnish

Method:

Gnocchi:

First of all, weigh out the right amount of butternut squash and sweet potato. It’s very hard to get exact measurements, so I would tend to go over as you’ll be taking the filling out of the skins once cooked anyway. The exact measurements don’t matter too much as long as you roughly have a 2:1 ratio of sweet potato to butternut squash, however I have put in the above measurements as a guideline.

Cut your sweet potato and butternut squash lengthways and place on a baking tray. Rub with a little olive oil and sprinkle with salt and pepper. Bake in an oven at 200°C for about 30 minutes. N.B. Depending on how big the butternut squash is this can take longer to cook, so I advise putting the butternut squash in about 10 minutes before the sweet potato to allow for the extra cooking it may need. Check half way through. Take out when you can easily insert a fork into the flesh, leave until cool enough to handle.

Whilst cooling, fry the walnuts and pancetta in a little olive oil until crisp, then put in a bowl, cover and set aside.

Once cool, scoop out the sweet potato and butternut squash flesh and put into a large mixing bowl.  Mash well with a potato masher until smooth, and then add the parmesan, egg, honey and salt. Give a final mash and then beat with a wooden spoon. Mix in the flour bit by bit, mixing along the way until it all comes together and forms a soft dough. It may seem like you’re adding a lot of flour, and depending on how old the sweet potato and butternut squash are, you may need to add even more flour, but don’t give up hope! As long as you remember to keep adding the flour and mixing in little bit at a time, you will eventually get there. The texture should be damp to the touch, but not so that it is sticky and gets stuck to your hand.

N.B. At this point you can section off half to freeze and it will keep in the freezer for a good few weeks. Or alternatively, if you are preparing ahead it’s at this stage you can cling film the dough and place in the fridge until half an hour before you wish to continue with the recipe.

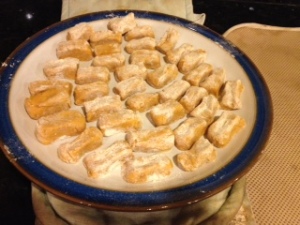
Turn the dough onto a floured surface and shape into a square (I used a rolling pin here, but make sure you put enough flour underneath so it doesn’t get stuck to the surface). I didn’t attempt to make any proper or fancy shapes, I simply used a sharp knife to cut rectangular shapes out of the dough, shaping as I went along, so I ended up with shapes like this:

Gnocchi.3

Be aware that the dough goes a lot further than you think, so I’d advice to make enough shapes as you think will feed you and however many people you are cooking for, then freeze the rest.

Now it’s time to cook your gnocchi and get your sauce on the go!

Bring a saucepan of water to the boil, adding a generous sprinkling of salt to the pan. When boiling, add the gnocchi and boil for about 5 minutes until tender. You can tell when the gnocchi is ready, as it tends to puff out and rise to the surface. Once ready, take off the heat and using a slotted spoon, carefully place the gnocchi (trying not to carry water over) onto some greaseproof paper on your work surface. (N.B. Reserve ½ cup of the pasta water)

Sauce:

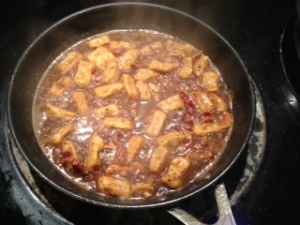
Meanwhile, in a large frying pan melt the butter until foaming, add the sage leaves unti going crisp and then remove and set aside. Add the shallots and keep stirring the sauce until browning and letting off a nutty aroma. When the butter is brown and shallots cooked, remove from the heat and stir in the balsamic vinegar, add the gnocchi, the walnuts and pancetta along with the ½ cup of pasta water you reserved from earlier – then put back on the heat.

Gnocchi.2

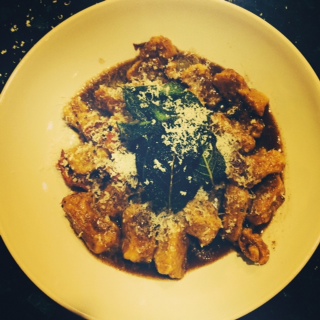
Simmer until the sauce has thickened and the gnocchi has a nice glazed finish. Plate up, add lots of freshly ground pepper, and top off with some more parmesan and the crisp sage.

Voilà!

Voilà!

//

The Boathouse – Newquay

Last weekend I ventured down to Cornwall with the girls I lived with at Uni for a mini break away! We stayed about 10 minutes inland from Newquay, and luckily my friends like eating out as much as I do, so we were on the search for a nice fish restaurant to go to on our last night.

On one of the days it rained (typical English weather!) so we hit up the spa, and one of the beauticians recommended a seafood restaurant called The Boathouse to us, which we were informed is great for a nice evening meal, so after perusing the mouth-watering menu online we booked a table for our last night.

The restaurant is in a great setting overlooking the harbour, and the only route to it is down some stone steps. Once you reach the bottom you are greeted by pools of the biggest fresh lobsters I’ve ever seen! 😀

Once inside, the restaurant has a great atmosphere, with a lovely homely, country feel. With a warm wooden interior and large candles on every table, the atmosphere is immediately relaxing and friendly. There is also a restaurant black lab, who when we were there happily trotted up and down the beach before curling up in a warm corner for a nap. The restaurant has a decking area where you can admire the view (roofed overhead with open sides) – they have thought ahead here and the decking is provided with multiple heaters to keep you warm, as well as plastic covers that roll down and fasten shut along the open sides to protect you from the typical English weather, which came in handy as even though it was glorious when we arrived, it was long before the rain and wind started to howl!

View from the decking

View from the decking at low tide

The only gripe I have is that the service was quite slow. We were all seated for quite a while before even our drinks orders were taken. By the time a waitress came to take our drinks order we were ready to order our food, but were informed she had to check to see if the kitchen was ready before we ordered?! This seemed a bit odd, and meant we had to wait even longer before ordering. Despite this, it didn’t affect our evening too much, and I think this tends to be a more laid back approach that many places adopt, which can come across as slow when comparing to London’s fast hustle and bustle!

We decided to just go for mains, and they were all delicious! I had one of the dishes from the specials, which was poached turbot in white wine and cream sauce, with asparagus and saffron infused rice. A few of my friends had the fish pie, another had the dressed crab and the last had the lobster pasta. We all thoroughly enjoyed our meals, definitely one for the seafood lovers to try!

//

Wahaca

As mentioned in various places on this blog, Will and I love Mexican food, and Wahaca is by far our favourite Mexican restaurant. Created by a past MasterChef winner, Thomasina Miers, this was always going to be a winner!

Currently Wahaca only exists in London, but as Will lives in London I get the chance to go quite regularly. We’ve now visited about half of the locations, most recently going to the new Islington location, conveniently just down the road from Will, it’s as if they knew 🙂

Encompassing a Mexican street food vibe, you are not able to book a table, however I don’t see this as an issue. Even though it does get very busy, the staff are always more than happy to help you set up camp at the bar, with some nachos and salsa/guacamole and one of their famous tequila cocktails, until a table becomes free. In most of the locations there are also a few table football tables to play a few games on to work up an appetite!

All of the restaurants have an exciting and colourful interior that transports you to Mexico. You can get a taste of what you are to expect by visiting the website, which is set up in the same style, accompanied by the kind of music you are likely to hear as you deliberate between the hundreds of dishes on the menu: http://www.wahaca.co.uk

Wahaca interiors

Another great thing is that if the bar is located away from the main eating area, such as with the tropical downstairs bar in the Soho location, then you are given a buzzer to alert you when you table is ready, which works really well.

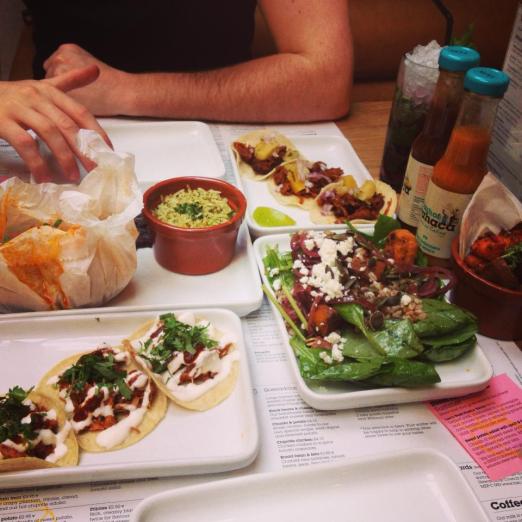
There is nothing on the menu I haven’t liked when I’ve tried it, but my favourites have to be the Pork pibil tacos, Chipotle chicken quesadillas and the sweet potato side with caramelised mojo de ajo, so good!

wahaca

There are always a couple of street food specials on, which we seem to always have, and they never fail to please! A recent one is pictured below – spinach, spelt, feta and sweet potato salad, garnished with a light dressing and pumpkin seeds, delicious!

wahaca2

In terms of pudding, the salted caramel ice-cream is to die for, infused with shavings of Valrhona chocolate this is by far one of the best ice-creams I have tasted anyway, ever!

Check out all that’s on offer here: http://www.wahaca.co.uk/html/ASSETS/Downloads/Wahaca_menu.pdf

One location that is a must is the South Bank Experiment, which is a relatively new temporary restaurant designed specifically for trialling new dish ideas and recipes, of which are successful are introduced to the main menus across the locations. And by experimental, I mean dishes like ‘Chapulines fundido’, commonly known as grasshoppers! You may cringe at the thought, but fried with shallots, garlic and smoky chipotle chillies, they’re pretty appetising 😛

The service is always good and friendly; it’s the perfect place for both a quick working lunch as well as a longer more relaxed dinner with family, friends, or your partner. I highly recommend it!

//

The Perfect Cheesecake Recipe

Cheesecake is most definitely my guilty pleasure, so when I saw a post on Twitter from Delicious magazine a couple of days ago about it being national cheesecake day, with a link to their cheesecake library, I couldn’t resist!

I tend to always make no bake cheesecakes, but when I saw this recipe I desperately wanted to make it, especially being called the perfect cheesecake recipe, how could I pick something else?! Of course, another factor that swayed my decision was that we had hundreds of beautiful big blueberries ready to pick! 🙂

Ingredients:

  • 50g butter, melted, plus extra for greasing
  • 200g stem ginger biscuits, crushed
  • 1 vanilla pod (I used 2 tsp of vanilla extract)
  • 400g mascarpone
  • 350g cream cheese (I used full fat philadelphia)
  • 125g caster sugar
  • 2 tbsp cornflour
  • 3 free-range eggs (freshly laid from my chickens!)
  • Grated zest of 1 small orange (I used a very large orange, for extra fruitiness)
  • 300g blueberries (fresh from our blueberry bush)

Method:

Firstly, preheat your oven to 180°C/fan160°C/gas 4 and grease a 25cm spring form cake tin generously with butter. Then crush the biscuits and melt the butter. I always put the biscuits in two or three plastic bags to allow for spillage, before hammering away! Very good for stress relief 🙂 Once nicely crushed, mix with the melted butter, and spoon into the cake tin, pushing down evenly across the entire base. Then put in the fridge to cool whilst you make the filling.

One thing I really loved about this recipe is how quick and easy is it do to the filling! Simply put everything (vanilla, mascarpone, cream cheese, sugar, cornflour, eggs and orange zest) in a big bowl and mix using a hand held electric whisk. A tip here is to break up the cream cheese and mascarpone with a wooden spoon first, otherwise you may end up with it in your hair if you go straight in with the electric whisk with too much vigour…

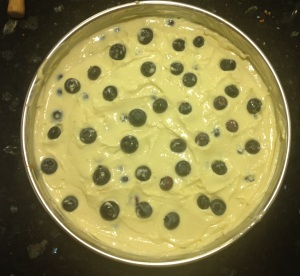
Once whisked together and everything is evenly combined, I gave a final beat with a wooden spoon, before stirring in all but a handful of the blueberries. Get your cake tin out of the fridge, and carefully spoon in the filling, flattening evenly across the tin with a spatula. Lastly, scatter the remaining blueberries on top, pushing gently into the mixture. Then it is all ready to go into the oven!

Ready to bake!

Ready to bake!

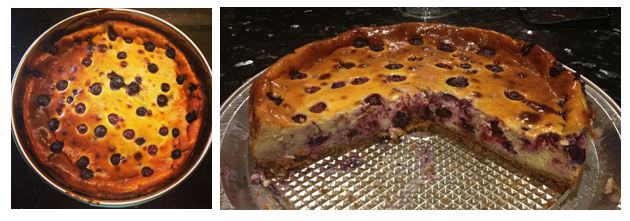
Bake for about 45-60 minutes, until golden brown but still slightly wobbly in the centre. Leave to cool before refrigerating – the cheesecake will firm up as it cools and is best eaten after being left overnight in the fridge. In Delicious Magazine’s recipe it suggests taking out of the tin once cool, but personally I like to leave in the tin whilst refrigerating also, and only taking out just before serving. Here’s my finished result:

Perfect cheesecake

//

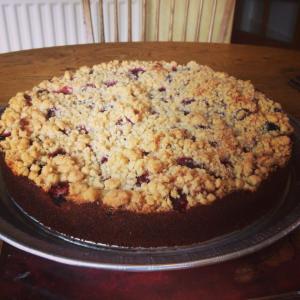
Raspberry Crumble Cake

The recent nice weather has made our fruit go mad, especially the raspberrys!

So I experimented (borrowing tips and tricks) to make this luscious raspberry crumble cake! This is a great recipe that I discovered stays moist for nearly 2 weeks when kept in an airtight container – if you can manage to make it last that long! 😛 It’s lovely warm as a pudding with custard, and equally delicious when cold with cream and additional fresh berries.

Ingredients:

Cake:

  • 140g butter
  • 250g caster sugar
  • 2 eggs
  • 1tsp vanilla extract
  • 175ml plain yoghurt (I used Greek)
  • 3tsp baking powder
  • 1/2tsp bicarbonate of soda
  • 250g plain flour
  • 225g fresh or frozen raspberries (I used fresh from the garden, yum! :))

Crumble topping:

  • 100g plain flour
  • 50g butter
  • 50g light brown soft sugar
  • Pinch of salt

Method:

Preheat your oven to 180 degrees celsius (or 160 degrees celsius if a fan oven), grease the sides of a 25cm spring form / loose bottomed cake tin, lining the base with a circle of greaseproof paper.

Now onto making the cake mixture, beat the sugar and butter together until pale and fluffy, add the eggs and vanilla and beat well again. After this, beat in the yoghurt, finally sifting the flour, bicarbonate of soda and baking powder in last, stirring gently until all combined.

The mixture should be quite a thick consistency once all the cake ingredients are combined. Scoop the mixture into your prepared cake tin, spreading out with a spatula to make sure it reaches all sides and is as evenly spread as possible. Then spread the raspberries evenly across the top of the cake mixture.

Leave this to the side, either with some cling fling on or something else covering it, then you can make your crumble topping. Like with any crumble mixture, start off by rubbing the butter and flour together to make a fine breadcrumb texture, then mix in the sugar and salt. Sprinkle this evenly on top of your raspberry cake mixture.

Put in the oven and bake for 50-60 minutes until golden, and when a knife is inserted into the middle it comes out clean. Once out of the oven, remember to leave to cool for at least 15 minutes, then you can take the cake out of the tin and allow to cool on a cooling rack. Then all that is left to do is cut out a slice and enjoy! 🙂

Remember to store in an airtight container to keep it nice and moist for up to two weeks. I think this recipe is great as the fruit never sinks either! Lastly, you can use any other type of berries here instead of raspberries and it will work just as well – I’m using blueberries next! 😀

raspberry crumble cake

//

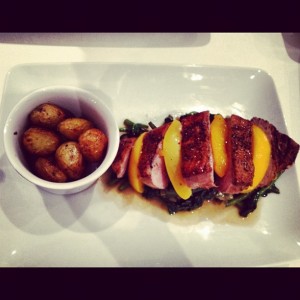
Duck Breast with Peach and Marsala Sauce

This is a favourite recipe (for picture for which is actually featured on the homepage) that can be made to look really impressive for a dinner party 🙂

The following is to serve two as a main course, but can easily be doubled to feed four.

Ingredients:

  • 2 big juicy duck breasts
  • Small bag (about 500g) of baby new potatoes
  • Pack of two big pak choi
  • 500g baby spinach
  • 150g spring onions
  • White canned peach segments, with juice
  • Marsala wine
  • Butter
  • Salt and pepper
  • Extra virgin olive oil

Method:

Score the skin of each duck breast and rub a generous amount of salt and pepper into the skin, whilst heating some olive oil in a large non-stick frying pan (keep the juice in the frying pan for cooking the veg later).

Cook the breasts skin side down for about 5 minutes, until they are browned nicely, turn over and cook for about 5 minutes on the other side, then transfer to a baking tray and cook at 180 degrees for a final 5 minutes, take out and rest on a wooden board.

Crispy brown skin!  (The duck, not Will)

Crispy brown skin!
(The duck, not Will)

NOTE: This will give you a nice pink and juicy duck breast, but if you like it a little more well done simply leave on the heat for a couple more minutes!

Whilst you are doing this, have another frying pan on the go, put 8-10 of the peach segments into the frying pan along with about 1/3 of the peach juice from the can, add to this a good glug of marsala wine. Let the peaches cook in these juices for 5-10 minutes until soft but retaining their shape and then remove the peaches onto a plate. Continue cooking the sauce until it reduces to thick syrup, adding more peach juice or Marsala wine desired to your preferred taste, and then transfer the sauce into a jug.

Whilst the duck is cooking, transfer the small bag of potatoes into a microwavable bowl, give a good coating of salt and pepper and add a few knobs of butter, microwave on high for 5-7 minutes, then transfer to a baking tray, drizzle over a little olive oil and bake at about 200 degrees for 8-10 minutes until golden brown, making sure you turn half way through.

With the left over juices in the large frying pan from cooking the duck, add a glug more olive oil and heat up again. Firstly add the chopped stalks of the pak choi and finely chopped spring onions, cook for a few minutes until softening. Then add the chopped pak choi leaves and spinach until they have wilted down enough, but not too much that they have lost all substance.

Arrange everything on a pre-heated plate and drizzle a little of the sauce over the duck breast, serving with the jug of remaining sauce.

This is how Will and I presented this dish when we cooked it for his parents when on holiday in France last summer:

255584_10150999722075927_1946951610_n

Enjoy! 😀

//

M&S ‘Delicious and Nutritious’ Salad Bites

As much as I love food, I do try to be healthy (mostly) – so when my friend told me about the new M&S salad bites in the ‘Delicious and Nutritious’ range, I was hopeful…  although at the same time sceptical at how can 6 little salad bites, some veg and a dip could fill you up AND only be around 150 calories?!

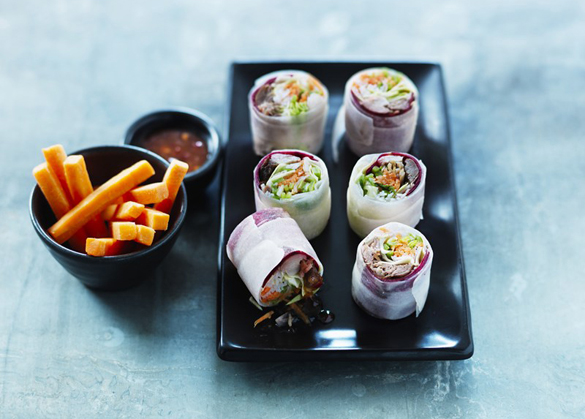
So the next time I was in M&S I made sure I found these promising little parcels… and I have to say, I was not disappointed! There were various options of pork, beef, tuna and chicken, but I decided to go for the ‘Vietnamese Style Marinated Pork Salad Bites in Mooli Ribbons with a Sweet Chilli Dipping Sauce’  (phew – long title!) and merrily took them into work one day this week for my lunch.

They were delicious! And not only that, they also filled me up until dinner time, which I was very impressed with, especially because I’m a serial snacker!

I didn’t have time to take a picture (as I was too hungry and they tasted too good!) but I found this interesting interview with one of Marks & Spencer’s Heads of Food Product Development: http://social.marksandspencer.com/food-drink/meet-april-preston/ which also has a great picture of the pork salad bites:

03_vietnamese-pork-bites_0085CROP

I really recommend trying the salad bite range, I know I’ll be seeking out the other flavours to try!

Rhubarb Mousse

The ever changing weather has certainly done wonders for my dad’s allotment! But one thing we have a ridiculous amount of at the moment is rhubarb. For the past few weekends we’ve been having many rhubarb crumble variations, but after a while it gets a bit boring, so I went exploring for something a bit different (and lighter on the waist line :P)

After some deliberation, I decided to make a rhubarb mousse. There seem to be endless recipes for different ways to make these, but one good thing is you can substitute ingredients to make it either more of a naughty treat, or a healthy and lighter desert – without losing any of the lovely creaminess!

I opted to use whipping cream, but each portion only amounts to a reasonable 270 calories 🙂

Ingredients (serves 4)

  • 300g rhubarb
  • 8 tbsp sugar
  • 2 tbsp water
  • 1/2 tbsp lemon juice
  • 3 gelatine leaves
  • 200ml whipping cream, whipped (you can also use Greek yoghurt here instead if you fancy!)
  • 2 fresh egg whites
  • A pinch of salt

Method

Firstly, chop the ends off the rhubarb sticks and peal off the stringy outside layer, then chop into small pieces. Put the rhubarb pieces along with the water and 3 of the tbsp of sugar into a saucepan and simmer over a medium heat for about 5 minutes, until reduced done and soft.

Whilst this is simmering, soak the 3 gelatine leaves in cold water for 5 minutes. When the rhubarb mixture is done, strain the gelatine leaves and stir into the rhubarb mixture, setting aside to cool. (TIP: the mixture cools a lot quicker by transferring into a  cold bowl, instead of leaving in the saucepan!)

rhubarb2

Combine the egg whites and pinch of salt, whisking until start to form soft peaks (far quicker and easier to use an electric whisk here if you have one! Also doesn’t mean your arm falls off ;)) After this, add the remaining 5 tbsp of sugar one at a time, whisking in between, until stiffens into a smooth meringue like substance. Then in a separate bowl, whisk the whipping cream (or yoghurt) until stiff.

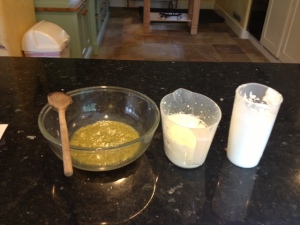
By now you should have your three ready bowls, as below:

Ready to mix!

Ready to mix!

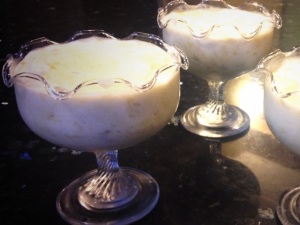
Gently fold the egg mixture into the cream/yoghurt, and then gently fold into the rhubarb. Divide equally into 4 pudding glasses/ramekins and leave in the fridge to set for at least 3 hours, once set take out and enjoy! 🙂

Ready to eat in their swanky glasses ;)

Ready to eat in their swanky glasses 😉

//

Home-made Ravioli

We both absolutely love pasta, especially when its home-made and fresh!

One evening we decided to use Will’s new pasta machine he got for his birthday and make some ravioli for our dinner 🙂

Ingredients:

Pasta:

  • 200g OO pasta flour
  • 2 eggs

Filling:

  • about 50g chorizo
  • 1 large red sweet pointed pepper OR a couple Karyatis roasted red peppers
  • 1/2 can chopped tomatoes
  • 1 tsp chilli flakes
  • 1 tsp Tabasco
  • 1 tsp chipotle
  • squirt of tomato paste

Method:

First of all make the pasta, put the flour on a clean surface, making a well in the middle. Crack the eggs into the well, then work around slowly with your fingers to incorporate the flour bit by bit until you have a firm ball of dough. Wrap in cling film and leave to cool in the fridge for at least 30 mins.

Whilst your dough is in the fridge, chop up all the ingredients for the filling into small pieces. Add to a saucepan over a medium heat, reducing to a thick sauce. Once ready, take off the heat and leave to cool a little while you roll the pasta.

When the dough has been in the fridge for 30 minutes, split into two even sections, and when your pasta machine is ready, roll out the first dough ball a little and start feeding  through the machine on the highest setting, lowering the setting and folding the dough over until you have a long, thin strip. (It’s best to have pasta as thin as possible without breaking when making ravioli). Once completed, do the same with the second dough ball until you have two similar size long sheets of pasta.

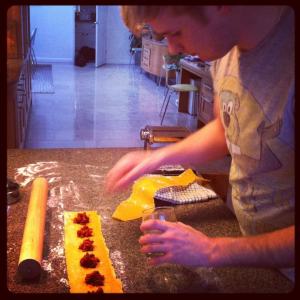
Lay one pasta sheet on top of a surface (sprinkled with flour so it doesn’t stick!) and cut off any uneven edges, then add small spoonfuls of your filling along the sheet, making sure you leave a decent gap between each spoonful:

Will in deep concentration...

Will in deep concentration…

Once complete, circle each spoonful of filling with a little water (and by little, I mean stick one finger in a glass of water – that will be enough per couple of spoonfuls) and then place your second sheet carefully on top.

This is where it’s handy if there are two of you – as one can hold the top sheet whilst the other presses down around each spoonful of filling to make sure there are no air bubbles, and make sure the two sheets are stuck together properly.

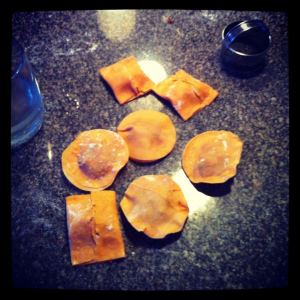
When happy with this, carefully cut out your desired shapes! You can either use a cake/pastry cutter for this, or create your own shapes with a knife, we decided to make both squares and circles 😛

Ready to cook!

Ready to cook!

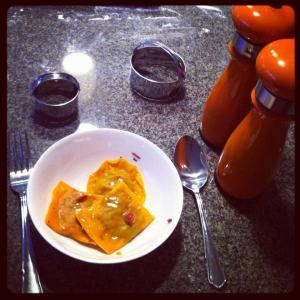
If any edges seem to be parting, you can secure with a little more water and press together. Bring a pan of water to the boil (with a little salt in) and carefully (ideally using a slotted spoon) place the ravioli pieces into the boiling water. They only need a couple of minutes, fresh pasta cooks very quickly! When the parcels rise to the surface and look soft they will be ready – this should be within 2-3 minutes.

Take your parcels out (again carefully with a slotted spoon to avoid any of them splitting) and divide between two bowls, drizzle a little olive oil over, season with salt and pepper and enjoy!

Yummy :)

Yummy 🙂

//